Back to Home About Mango & Tomato Contact MePublicity & News Hire Me!Portfolio

8/13/11

Kodak Gallery Photo Book

The first ever digital camera I had was a Kodak. This was almost 10 years ago. Here's the story: my mom asked me if I wanted a camera. I said no. Then when I came to visit my parents in Seattle for New Years and opened my New Year present, amongst towels I found a Kodak digital camera. I lost my sh*t. Seriously! In fact, my reaction, a full-on meltdown, was recorded by my dad. Trust me, it's not pretty! If I ever bring a man home, I'm sure my parents will show him that video to tell him what he's getting into.

I did not want a camera. I did not have a computer back then, so what good would it do me to have a digital camera?

Needless to say, I've come a long way from my first Kodak camera to my Canon Rebel. I also hope I learned how to behave more graciously and grown up, but you'll have to ask my parents about that.

Why am I telling you this story? Because things have a funny way of coming a full circle. As part of The Foodbuzz Tastemaker Program, I occasionally have a chance to try out new products. This time, instead of trying a food product, I got an opportunity to make my own Kodak Gallery Photo Book. How cool is that?


The hardest part in this project was deciding which photos to choose. Everything else was incredibly simple: you basically choose a page layout, upload photographs or text and you are pretty much set.

In the end, I decided to make a book of some of my favorite food, travel and flower photos. See the pages below and make sure to look/read the entire post because there will be something special for every one of you at the end. Promise!

Blueberry Chia Lemon muffins I made for Robyn's blog
 

Goat Cheese Ice Cream and Mango Frozen Yogurt 


Dinner at Estadio in DC
 

Chicken for Chicken Tortilla Soup and Breakfast Pizza 


Stir Fry for Robyn and Mint Chutney with Indian Puffed Rice


Beet greens with Swiss Chard and Peaches


People holding fruit {Nicole on the lower left and Julia on the top} and Seattle Pike Place Market
 

Travel: Boston & DC
 

Flowers: Boston & DC
 

Flowers around Capitol Hill in DC
 

My love: Orchids!


Thoughts? Hope you enjoyed looking at my book. My dad told me I should find a publishing company and sell it world wide. Oy!

And now, here's a little surprise to YOU: you can get 40% off your own book until August 31st! What are you waiting for? Let your creativity run wild and follow this link.

8/11/11

Cooking with PastaPrima: Grilled Chicken Ravioli with Vegetables & Blue Cheese

A few weeks ago I received a package from PastaPrima with several varieties of ravioli and was asked to come up with a fun recipe that would not be your typical ravioli with sauce dish.

I was up for the challenge! Who knows, maybe I'll even win the grand prize of $1,000 worth of must-have kitchen tools?

One can dream, right?

About PastaPrima:

"Pasta Prima is both American owned and family owned. Over 25 years ago, a husband and wife team began handcrafting ravioli in California. Known as "one of Club's best" and "spinach kids eat," our frozen Spinach and Mozzarella Ravioli was our first product. Ready in ten minutes, our creative Spinach and Mozzarella Ravioli fans serve Pasta Prima fried when entertaining. In the summertime, they enjoy Pasta Prima grilled or served cold in pasta salad. Pasta Prima is made in America. "

"Pasta Prima begins with the highest quality, 100% Natural ingredients. From fresh cut vegetables to aged-imported cheeses, we source from local producers and the world's best. Pasta Prima's gourmet fillings are preservative-free with nothing artificial. Gone organic? Our Organic Ravioli is gentle on your body and the environment. If you are avoiding wheat, we replace it with 100% Natural corn and rice flour in our Gluten Free Ravioli. "

I decided to use the Grilled Chicken and Mozzarella Ravioli and combine it with Summer fresh vegetables and blue cheese. Note that the packaged ravioli came with Parmesan & Herb mix, but I left it out.

Grilled Chicken Ravioli with Vegetables & Blue Cheese

Ingredients
8 ounce package of PastaPrima Grilled Chicken and Mozzarella Ravioli
2 teaspoons olive oil
2 garlic cloves, chopped
2 cups snow peas, ends trimmed, cut in half on diagonal
1 yellow pepper, sliced thinly on diagonal
1 cup halved cherry tomatoes
6 basil leaves, chopped
1/4-1/3 cup crumbled blue cheese


Directions
1. Cook ravioli according to the directions on the package.
2. Heat olive oil in a pan. Add garlic and saute for a few minutes.
3. Add snow peas and saute for 2 more minutes. Do the same with yellow pepper.
4. Add cherry tomatoes and drained ravioli. Let everything warm through for a few minutes.
5. Turn off the heat, add the blue cheese and basil. Let the blue cheese melt into hot vegetables and ravioli.
6. Serve immediately.


How incredibly simple is this dish? Of course you can use any pasta/ravioli you have on hand. Feel free to add zucchini, green onions and or mushrooms. If you think blue cheese is too strong, go with mozzarella.

What's your favorite way of cooking/eating pasta that is not your typical pasta + sauce?

PS see the little fork in the first photo? I found it in a 2nd hand store with Jenna for $2! And I also found a cute little spoon there for another $2. What a bargain ;)

8/9/11

Recipe for spicy turkey meatballs

Meatballs weren't a typical item on a menu in my house in Russia. Instead, we ate kotleti: sort of similar to burger patties, they were made from beef, garlic, onion, salt & pepper with an addition of an egg and some bread.

These kotleti were formed into patties and cooked on a pan till the outside was crispy. Instead of eating them on a bun, we had them with mashed potatoes, rice, pasta or buckwheat.

My mom, however, did make ezhiki. Say what? In Russian it means little hedgehogs. These were mini meatballs made with beef and rice and usually added to the soup. Meatballs & spaghetti wasn't something I discovered till my family moved to the States.

In the last 18 years, I've tried beef, pork, chicken and turkey meatballs. I've had them over rice, on top of salads, both in tomato or cheese based sauces and of course with spaghetti.

This time I'd like to share with you a recipe for Spicy Turkey Meatballs I came up with. If you are still feeling eeffie about turkey, feel free to use ground chicken.

Ingredients (makes about 23 meatballs)
olive oil for cooking
1 pound ground turkey
2 chipotle in adobo peppers, seeds removed, finely chopped
2 Laughing Cow Cheese Light Mozzarella Sundried Tomato wedges 
16 basil leaves, chopped (Thanks, Sylvie)
2 garlic cloves, minced
salt & pepper
1/4 red onion, chopped finely


Directions
1. Combine all ingredients together other than olive oil.


2. Form uniform meatballs.


3. Heat olive oil in a nonstick pan. Add meatballs and cook them till they are browned all around and are cooked through. This should take about 10-12 minutes total.


Alas, I could not really taste the cheese. The chipotle in adobo sauce, however, really shined through and gave these meatballs a nice kick!

What do you add into your meatballs?

8/5/11

Dry Tart Cherry, Nuts & Chocolate Chip Cookies

In the past I've mentioned how completely impressionable I am. If I see something on TV, on someone's blog or in a restaurant, those things/ideas get stuck in my head and constantly bug me to make them.

This is especially true if those things/ideas remind me of something awesome from my past.

Case in point: last month Anna, my twin, told me she was making Sour Cherry and Pecan Cookies with Chocolate Chips for a class she was teaching at Whole Foods.

I knew I'd have to make them. First, I love cookies. Second, I love nuts and cherries and chocolate. And third, the combination reminded me of the cookies my friends Jenny, Laura and I would buy from a Cookie Cafe when we all worked together. Good times! Miss you, girls.

So a few weekends ago I set out to bake. Despite the 100 degree weather.

But as always, I just had to make a few changes. I decided to make two different batches: one with pistachios, cherries and white chocolate chips and another with walnuts, cherries and semi-sweet chocolate chips. Variety is the spice of life, right?

Since this is not a recipe I invented, I'm not reposting the recipe. I'll just summarize it. But you can find the specifics here.

Here are my mix-ins:

You basically combine dry ingredients and wet ingredients in separate bowls. Make sure the butter is at room temperature.


You then combine the ingredients from both bowls together. At this point, I divided the cookie better in two and added my mix-ins to each half.

pistachio/white chocolate chips/dry cherries

walnuts/semi-sweet chocolate chips/dry cherries

Then, instead of making the cookies right away, I rolled the cookie dough into two logs, and put them in the freezer for 30 minutes. Similar to what I did with Joe Yonan's Pistachio Cookies. This not only hardens the dough so that your cookies don't spread too much during baking, but it also allows you to bake just a few cookies at a time and save the rest of the dough for later. This is a great trick when you live alone and don't want to be stuck eating a few dozen of cookies solo. Trust me!


Here's the final product. What can I say? I'm slightly obsessed with using the Chinese container for photographing my food. I think it makes the cookies look especially adorable.

I ended up liking the walnut/cherry/semi-sweet combination better. However, I think if I had a better quality white chocolate chips, that would have really helped because I do love pistachios.

Something to be aware of: when you will be mixing the cookie dough with all of the mix-ins, you might panic. I panicked. Why? Because it seems like there is just too much "extra stuff" and not enough dough. And since you don't have Anna's number (or mine), I'm just going to tell you: trust the recipe. It will all work out at the end. {Of course I called Anna and panicked and she told me to calm down, bake the cookies and trust her. She was right.}

What is your favorite cookie combination?

Have a fabulously sweet weekend.

8/3/11

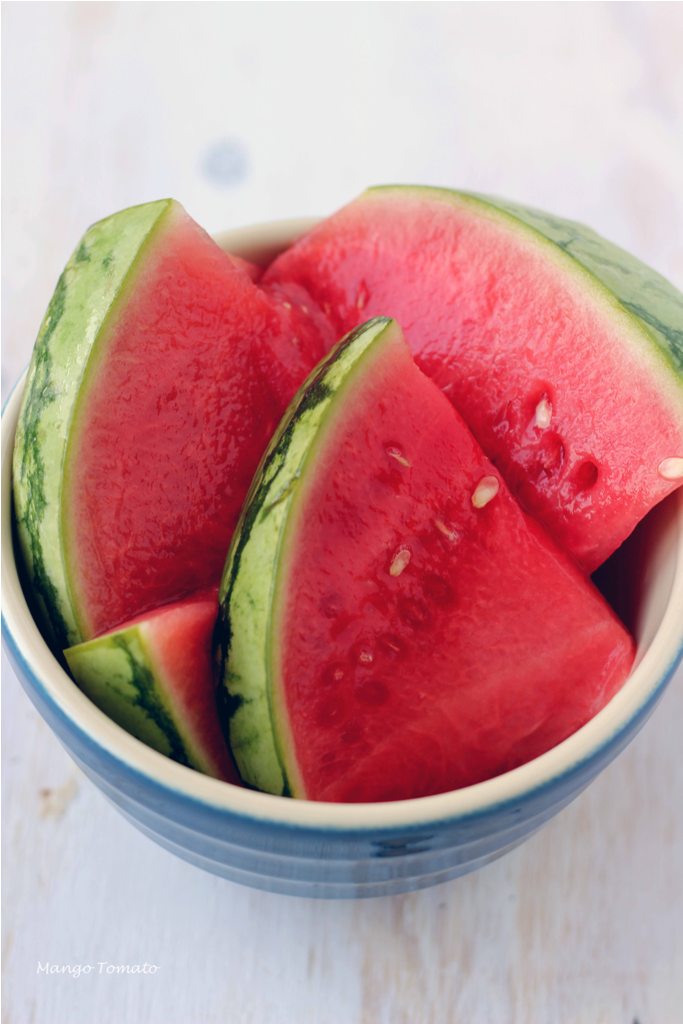
Easiest recipe for pickled watermelon

Apparently today is Watermelon Day. I'm more than happy to celebrate. Watermelon is one of the things that screams summer to me.

I remember growing up in Moscow (not the Idaho one) and eating watermelon in the hot summer months both in the City and whenever my family took Summer vacations by the Black Sea. Oh, those were the times.

Our watermelons back then had seeds. Of course as a child it was fun to spit out the black shiny seeds, but as an adult I prefer the American seedless watermelon.

During the summers, my sister and I also visited our grandparents in a little town in Ukraine called Chernovtsi. Our brother wasn't born yet.

My grandparents loved to cook and fed us well to ensure we weren't skinny. They took this task seriously. We had bread with butter, tomato/cucumber/dill salads. roasted potatoes that were golden and crispy, and many baked treats.

One of my favorites, however, was a snack of pickled watermelon. It was a gorgeous pink color and just with the perfect balance of sweet and salty. Although my grandparents did a proper pickling job, I decided to take a few short cuts last weekend for my first time making pickled watermelon.


Instead of making my own pickling solution, I used the liquid from Phickles' Okra and Snap Beans.


All I did was slice a mini watermelon thinly, put it into a shallow'ish container, cover it with the liquid from the pickled okra and green beans and let it sit in the refrigerator over night.


Here's what you get. The longer you let the watermelon sit in the pickling solution, the less sweet it will be. Once you like the taste of your pickled watermelon, remove it from the pickling solution and store separately.


How to eat this? Straight out of the refrigerator as a snack. Or you can add it to salads.

What's YOUR favorite way to eat a watermelon?

8/2/11

Squash Blossom Festival at Oyamel in DC

Last night I had a great pleasure of dining at Oyamel, one of Jose Andres' many restaurants in Washington DC. This was not my first time at Oyamel, but the first time to experience the menu specifically prepared for the Squash Blossom Festival.

Big thank you to Heather Freeman PR for the dinner invitation!

From the restaurant:
Join us this August for the annual celebration of the this most delicious flower. Special antojitos created by José Andrés and Oyamel’s Head Chef Joe Raffa will feature squash blossoms in every form.
The festival goes through August 14th, so make your reservations and go!

I will highlight some of my favorite dishes from the night.

As soon as I walked into the private room, I was handed a Honeydew Punch. Look at the photo on the left: is this one of the prettiest drinks you've ever seen? The answer was a YES for me. The cocktail consisted of Siembra Azul Blanco, Neisson Rhum Agricole, honeydew melons, squash blossom and lemon mint shrub over hand-cracked cucumber  ice. The most important thing, however, was that the cocktail was light, sweet and refreshing.

One of the regulars on the menu at Oyamel is guacamole prepared table-side, and no meal at Oyamel should be without this creamy dish.


While we sampled the dishes on the menu, we got to sip on the Matthiasson, Ribolla Gialla-Sauvignon Blanc-Semillion from Napa Valley (2010). In fact, Oyamel is planning on giving wine a bigger role on its menu and focusing more on wine cocktails and wine/food pairings. This bottle of white wine not only had a gorgeous label, but was slightly on the sweeter side and had a very fresh and crisp taste. It went great with some of the spicier dishes.


Below is a photo of Empanadas de flor de calabaza estilo Tlaxiaco. It's a house-made corn tortilla filled with squash blossom, house-made requeson cheese, costeno chiles and epazote. This dish comes from the mountainous regions and is quite hearty.

The chef even gave us the recipe for the requeson cheese: heat a gallon of milk, add 2 cups of sour orange juice and let it sit and separate into solids and liquid. The "solids" would be your cheese. The process reminds me of making Indian paneer.


Then we moved to Tamal de flor de calabaza: a house-made corn tamal with squash blossoms, braised pork, queso fresco, corn, zucchini and epazote. I wish there would be a bit more pork in this dish, but other than that the flavors, textures and even colors were well balanced.


The last savory dish of the night happened to be my favorite: Flores de calabaze Veracruzana: squash blossoms filled with Westfield Farm goat cheese, poblano peppers and epazote, served atop a Veracruz-style tomato and caper sauce. The mild smooth goat cheese was a great contrast to the salty tomato/caper/olive sauce. I could have had 10 of these!


And finally, there was dessert. When I read that we'll be eating a Mexican popsicle, I wasn't quite sure if I'd like it. And guess what? I loved it. This was a Paleta de flor de naranja: house-made Mexican popsicle with orange blossom and vanilla cream. This was the perfect dish to end the meal: sweet, cold, and not at all heavy. Plus, I really liked the presentation.


What are YOUR favorite dishes with Squash Blossoms?

8/1/11

Simple Onion Jam Recipe

A few weeks ago my friend Danielle asked if I'd like some onions she got from a CSA and did not want. I said sure.

So the next day Danielle brought 6 HUGE white onions to work. I had no clue what to do with them, but I was happy to try and figure it out.

Of course the first thing that came to mind was French Onion Soup. You might find it hard to believe, but although I love the soup, I've never made it. The idea of hot bubbling soup in the 100 degree weather, however, was almost repulsive.

That's when I posed the question on Twitter and luckily received a few suggestions to make onion jam.

I searched for a recipe, but everything I was finding had too many ingredients and steps and seemed to almost mask the flavor of the onions. I decided to make up my own little recipe.


Simple Onion Jam

Ingredients
2 tablespoons olive oil
4 large onions, peeled, sliced thinly using a food processor
salt & pepper
3 tablespoons apple cider vinegar
1-2 tablespoons brown sugar


Directions
1. Heat oil in a heavy bottomed pan (I used my 5.5 quart Le Creuset)
2. Pat the onions with a paper towel to get rid off some of the moisture. Add to the heated pan with oil and cook the onions on medium high heat for 20 minutes, mixing occasionally.
3. Season the onions with salt and pepper, and continue to cook for 10 more minutes. At this point, the onions should be turning a nice brown color.
4. Add the apple cider vinegar, mix, and continue cooking for 5 minutes on lower heat. The vinegar will help to deglaze the pan and add a bit of sweet and sour flavor to the onions.
5. Add 1-2 tablespoons of the brown sugar and cook for 5 more minutes.


I have been keeping this onion jam in a jar in my refrigerator for a few weeks now. It's great as a topping for crackers and cream cheese or mixed into roasted eggplant. You can also use it as a topping for pizza or sandwiches, mix it into polenta or rice.