Back to Home About Mango & Tomato Contact MePublicity & News Hire Me!Portfolio

6/14/12

Recipe for Lemon Cream. Pucker Up!


It looks like this week is all about sharing recipes I made from my growing collection of cookbooks. Hope you don't mind! I might share a restaurant review with you over the weekend...or make you wait until next week.

Last month, I received a preview copy of Grace's Sweet Life. The book is all about desserts: Homemade Italian Desserts from Cannoli, Tiramisu and Panna Cotta to Torte,  Pizzeelle and Struffoli.

Each recipe is introduced by its Italian name, which made me quite nervous. It just seemed to make the recipe sound that much more difficult, albeit authentic. Also, the instructions were a bit lengthy.

I decided to try making the lemon cream. No, the recipe for lemon cream wasn't a separate recipe. It was part of Tartelette alla Crema di Limone e Meringa all Italiana! Or in English, Lemon Meringue Tartlets. I skipped the tartlets and the meringue part ;)

Lemon Cream
Recipe from Grace's Sweet Life by Grace Massa Langlois

Ingredients

1/4 cup plus 1 teaspoon heavy cream

1/2 cup freshly squeezed lemon juice (from about 2 lemons)*

grated zest of 1 lemon

4 large egg yolks, at room temperature

1/2 cup superfine sugar**

1/4 cup plus 1 tablespoon unsalted butter, at room temperature, cut into 10 equal pieces

*I was doubtful that 2 lemons will provide enough juice, but it actually worked! Just to be on a safe side, pick up a few extra lemons at the store

**I did not have superfine sugar and could not find it at the store, so ended up putting regular sugar into my food processor and "chopping" it until it appeared superfine.

Directions
1. In a small saucepan over medium heat, bring the heavy cream and lemon juice and zest to a boil.
2. In a medium bowl, whisk the egg yolks and sugar until pale in color.


3. In a slow, steady stream, gradually pour the hot cream mixture into the egg mixture, whisking constantly until well combined.
4. Pour the egg-cream mixture into the saucepan and bring to a boil over medium heat, whisking constantly.
5. Continue to cook, whisking constantly, until the mixture thickens, about 5 minutes.
6. Strain the lemon cream through a fine-mesh sieve into a medium heatproof bowl. Whisk in the butter two pieces at a time.


7. Place a sheet of plastic wrap directly on the surface of the lemon cream to prevent a skin from forming while it cools. Refrigerate for at least 30 minutes.


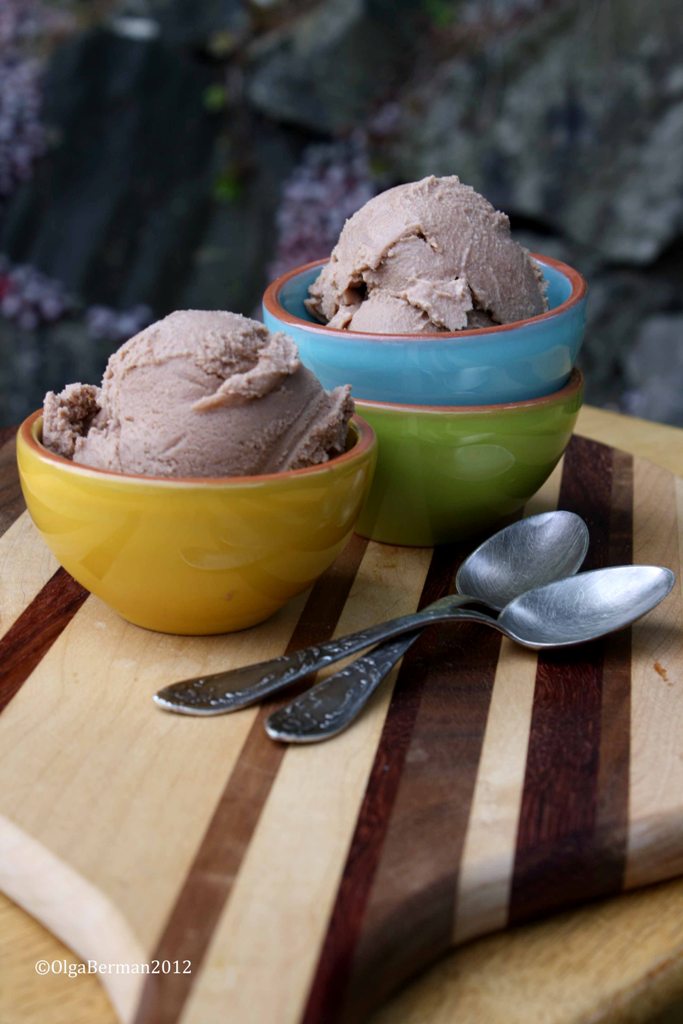
You can eat the cream with berries or use it as a filling for cakes and tarts. It's definitely lemony and tart, but at the same time buttery and smooth. Plus, the color is stunning.


I ended up giving a jar of the lemon cream to a friend at work. When I asked her how she used it, she said "ate it with a spoon." There you go ;)


Have you made lemon cream before? How would YOU use it?

6/12/12

Chilean Sea Bass with Coconut Rice and Avocado Kiwi Salsa from Serve Yourself Cookbook by Joe Yonan


You guys, this is one of the best recipes I've made in a very long time. It's simple, pretty, delicious, satisfying and takes less than 30 minutes to make. This Chilean Sea Bass with Coconut Rice and Avocado Kiwi Salsa is slightly adapted from Serve Yourself Cookbook by Joe Yonan. I've made two recipes from Joe's book (pistachio cookies and pickled onions) which I loved, so I had high expectations for this dish.


The recipe calls for mahi mahi, but I decided to go with Chilean Sea Bass because it looked better at my grocery store.


Chilean Sea Bass with Coconut Rice and Avocado Kiwi Salsa
Slightly adapted from Serve Yourself  Cookbook by Joe Yonan

Ingredients
1 (6-ounce) Chilean Sea Bass fillet
kosher or sea salt
freshly ground black pepper
3/4 cup coconut water (must be labeled 100% coconut water)
1/3 cup jasmine or other long-grain white rice
1 kiwi, peeled and cut into 1/2-inch cubes**
1/2 ripe avocado, peeled, pitted, and cut into 1/2-inch cubes
1/2 fresh jalapeno chile, stemmed, seeded, and finely chopped
juice of 1 lime
leaves from 3 or 4 sprigs cilantro, chopped
1-2 tablespoons chopped red onion
1/2 teaspoon honey

**I ended up doubling all the ingredients for the salsa. The recipe called for a scallion, but I forgot to buy one and used some red onion instead.

Directions
1. Pat dry the fish with a paper towel and season with salt and pepper.
2. In a small skillet fitted with a lid, combine the coconut water, rice and 1/4 teaspoon f salt over medium-high heat. Bring to a boil, then decrease the heat until the liquid is barely bubbling. Place the fish fillet on top of the rice, cover, and cook for about fifteen minutes, or until all the coconut water is absorbed.
3. Turn off the heat and let the rice and fish stand, covered, for another 5 minutes.
4. Meanwhile, combine all the ingredients for salsa.


5. Transfer the rice and fish to a plate, top with the salsa.


Chilean Sea Bass came out flaky and tasted very buttery, which is a good thing. The rice had the scent of coconut without all the added calories of coconut milk. I loved, loved, loved this dish!


Hav you cooked with mahi mahi or Chilean Sea Bass lately? What did you make?

6/6/12

Julia Child's Vichyssoise Recipe: Cold Leek & Potato Soup. JC100


I'm part of JC100! What is JC100? It's a celebration of Julia Child! We are provided with Julia's recipes, make them and blog about them.

This is my first recipe (out of 5 provided) so far. I decided to make it because it's incredibly simple and screams COMFORT food!

All you need are potatoes, leeks, chicken stock, salt, cream and chives. That's all!


Vichyssoise
{Cold Leek and Potato Soup}
Excerpted from Mastering the Art of French Cooking by Julia Child. Copyright © 1961 by Alfred A. Knopf. Reprinted with permission from the publisher Alfred A. Knopf, a division of Random House, Inc.

Ingredients
3 cups peeled, sliced potatoes
3 cups sliced white of leek
1 1/2 quart chicken stock
salt to taste
1/2 to 1 cup whipping cream
white pepper {I thought it was completely fine without it}
2-3 tablespoons minced chives

Directions
1. Simmer the vegetables in chicken stock for 40-50 minutes until they are tender. 
2. Puree the soup {I used my immersion blender}.
3. Stir in the cream. Season with salt. Chill.
4. Serve the soup in chilled soup cups and decorate with chives.


I had this soup both hot and chilled and liked both versions. It's smooth without needing to go through a fine sieve as was noted in the original recipe. It's simple, yet decadent and would be a great starter for a dinner party.


Have you  made any of Julia's recipes? Which ones are your favorite?

Pan Roasted Red Grapes with Farmer's Cheese, Garlic and Thyme: Easy Appetizer Idea

A few weeks ago, Pinterest was being bombarded (in a good way!) by gorgeous photos from Alexandra's Kitchen for Roasted Grapes with Thyme, Fresh Ricotta & Grilled Bread.

The recipe was straight forward, and the final results seemed drool-worthy.

I filed it away in my brain for things to try.

Then I made Frozen Peach Yogurt and had quite a bit of whole milk leftover. Plus, heavy cream.

God knows I don't need to directly consume either one of those ingredients, so I decided to make paneer from them.

Alas, what was meant to be paneer, turned out to resemble ricotta or farmer's cheese a bit more.

And then red grapes went on sale at my grocery store.

Basically, all these random things came together nicely in order for me to make my version of Alexandra's recipe.

Since it was pretty hot this past Sunday, instead of roasting the grapes in the oven, I decided to pan roast them. I also added GARLIC to give a bit of a kick to this fun appetizer idea.


Pan Roasted Red Grapes with Farm Cheese, Garlic and Thyme: Easy Appetizer Idea
Slightly adapted from Alexandra's Kitchen

Ingredients

olive oil

red grapes

sprigs of thyme

kosher salt

sliced baguette

garlic clove, peeled, sliced in half

fresh ricotta or farmer's cheese

Directions

1. Heat a skillet on medium-high. Add olive oil. Once the oil is hot, add grapes and thyme sprigs and season with kosher salt. Allow the grapes to cook until they are ready to burst, stirring occasionally.

2. Toast slices of baguette and rub with garlic.

3. Spread farmer's cheese or ricotta on the slices of bread, top with grapes and a few fresh thyme leaves. Eat immediately.


What's not to like about this!? You can serve this dish as an appetizer or main course with a salad. Once I took photos, I also added cured ham to my mini open faced sandwiches: divine!

6/4/12

My Version of Mexican Corn: Dress Up Your Corn. No Grill? Use Your Panini Maker!

Happy Monday! I'm sad this is not another three day weekend, but such is life. I've spent the weekend eating out and shopping with great friends, salsa dancing, swimming laps in the pool and cooking. I'll share those recipes with you later, but for today, let's talk about corn.

I love corn. Fresh, frozen, even canned. I like it in soups, salads, or simply boiled.

Below is my version of Mexican corn. I do not claim this to be authentic. It's just something I put together. Since I don't have a grill, I used my panini maker.


My Version of Mexican Corn

Ingredients

corn

olive oil

bourbon smoked paprika

salt & pepper

lime juice, plus extra lime wedges

feta

cilantro, chopped


Directions
1. Heat your panini maker.
2. Rub the corn with olive oil and paprika. Season with salt and pepper.
3. Cook the corn in the panini maker, rotating occasionally until it has softened and you can see "grilled marks."


4. Drizzle the corn with lime juice, and sprinkle with feta and cilantro. Serve with additional lime wedges.


This was freaking amazing!!! I had a hard time eating only one of these at a time. Clearly, the feta and cilantro fall off as you eat the corn, so make sure to have plenty of napkins available: this is one messy dish. Also, have extra feta and cilantro to keep on adding to your corn as you make your way around the cob.


Have you ever had or made Mexican corn? What technique do you use?

6/1/12

Herbivoracious by Michael Natkin: Latin American Green Lentil Salad

One of the fun things about volunteering at the Eat Write Retreat in May was the swag. Who doesn't love food related freebies?

One of the items in the swag bag was a cookbook by blogger-turn-cookbook author Michael Natkin.

Michael's book has the same title as his blog: Herbivoracious. Try saying that ten times ;)

The cover of the book is absolutely stunning. The book itself contains 150 vegetarian recipes.

Vegetarian?

Yes, even though I love meat and seafood, I don't shy away from making completely vegetarian recipes. After all, variety is the spice of life.

Last weekend, when I was low on inspiration, I decided to look through Michael's book and ended up bookmarking Latin American Green Lentil Salad recipe.

The salad seemed hardy because of the use of French green lentils, but light and fun because of the addition of cucumbers, radishes and avocado.

I made a few changes to the recipe when making it: instead of using queso fresco I used feta. Instead of using parsley and mint, I used cilantro. And finally, I used red skinned potatoes, which actually took quite a bit longer to cook than the book suggested. Also, I did not really measure anything: I just guesstimated. That's how I cook. But for your sake, I'll copy the recipe with specific quantities below.


Latin American Green Lentil Salad
Slightly adapted from Michael Natkin's Herbivoracious

Ingredients

1 1/2 cups French green lentils
2-3 red skinned potatoes, cubed
3 tablespoons olive oil, plus additional for the potatoes
kosher salt
1/2 medium cucumber, diced {the book suggested you peel and seed the cucumber first}
6 radishes, thinly sliced
1/2 small red onion, thinly sliced {the book suggested you finely dice them}
2 hand fulls cilantro, chopped
juice of 1 lemon
1/2 cup feta
ground pepper
1 avocado, sliced


Directions {I changed some of the wording to reflect what I did.}

1. Preheat the oven to 400F.
2. Rinse the lentils and pick them over for stones and debris. Pace them in a saucepan, cover with plenty of water, bring to a boil, cover, lower the heat and simmer until the lentils are tender but not falling apart.
3. Meanwhile, drizzled the potatoes with olive oil, season with salt and pepper and roast until they are tender. This can take anywhere from 30 to 60 minutes.
4. Once the lentils are cooked, drain and cool them.

There are two different ways to serve this salad.

In the first method, I added lentils to a shallow plate and then positioned the rest of the ingredients on top in pretty rows, similar to Salad Nicoise.


In the second method, I combined everything other than feta and avocado in a bowl, then layered slided avocado on top and sprinkled with feta. Clearly, you can choose whichever presentation looks best to you.


Do you have a favorite vegetarian side dish? What is it?

Have a great weekend!

5/30/12

Recipe for Frozen Peach Yogurt and My Culinary Crush on Jeni's Splendid Ice Creams at Home Cookbook

Recipe for Frozen Peach Yogurt and My Culinary Crush on Jeni's Splendid Ice Creams at Home Cookbook

This might be the longest post title I've ever written!

It has been hot and humid in DC the last past week and I have been trying to spend as much time in my air conditioned condo as possible.

Earlier last week, however, I tracked to my library because there was something special waiting on hold for me: Jeni's Splendid Ice Creams at Home cookbook by Jeni Britton Bauer.

I started paging through the book even before I got home. It has recipes for ice creams, frozen yogurts and accessories such as sauces and chocolate bombe shells. The photography is bright and playful and the recipes are divided by season.

I have many pages marked, but one of the recipes that stood out the most to me was the Baked Rhubarb Frozen Yogurt.

Alas, my grocery store was out of rhubarb. Figures. I decided to use peaches instead. I changed Jeni's recipe a bit: first, I cooked the peaches in butter in a skillet instead of baking them. Second, I used almost double the fruit amount Jeni listed in her recipe. What you'll see below if my version of the recipe.


Frozen Peach Yogurt
Slightly Adapted from Jeni's Splendid Ice Creams At Home

Ingredients

1 quart plain yogurt

1 tablespoon butter

1/3 cup sugar

1 pound peaches, pitted, cut into small pieces

1 1/2 cups whole milk

2 tablespoons cornstarch

2 ounces (4 tablespoons) cream cheese, softened

1/2 cup heavy cream

2/3 cup sugar

1/4 cup light corn syrup


Directions

1. The night before you want to make the frozen yogurt, fit a sieve over a bowl and line it with two layers of cheesecloth or paper towels. Pour the yogurt into the sieve, cover with plastic wrap and refrigerate for 6 to 8 hours to drain. You will need 1 1/4 cups of the total drained yogurt for this recipe.

2. In a skillet, heat butter, add peaches and sugar and cook until the peaches are soft but not falling apart. Set aside. While the peaches are cooking, prepare an ice bath: big bowl filled with ice and cold water.

3. Mix about 3 tablespoons of milk with cornstarch in a small bowl.

4. Whisk the cream cheese in a medium bowl until smooth.

5. Combine the remaining milk, the cream, sugar, and corn syrup in a 4-quart saucepan, bring to a rolling boil over medium-high heat and boil for 4 minutes. Remove from the heat and gradually whisk in the cornstarch mixture.

6. Bring the mixture back to a boil over medium-high heat and cook, stirring with a heatproof spatula, until slightly thickened, about 1 minute. Remove from the heat.

7. Gradually whisk the hot milk mixture into the cream cheese until smooth. Add the peach mixture and 1 1/4 cups of drained yogurt. Blend well.

8. Pour the mixture into a 1-gallon plastic freezer bag, seal and submerge into the ice bath. Cool the mixture for about 30 minutes.

9. Pour the frozen yogurt base into the frozen canister and spin until thick and creamy. Pack the frozen yogurt into a storage container, press a sheet of parchment directly against the surface, and seal with an airtight lead. Freeze in the coldest part of your freezer until firm, at least 4 hours.


Tada!


This recipe has quite a few steps, but it's oh so very worth it! The flavor of the peaches really comes through and you can make this recipe your own by using other fruit and experimenting with adding citrus zest or even a bit of liquor as a flavoring agent.


In the past, I've also made goat cheese ice cream from Jeni's book and loved it.

Do you have this book? Have you made any recipes from it? What is YOUR favorite flavor of frozen yogurt or ice cream?

5/28/12

Perfect Side for Memorial Day Picnic: Jicama Slaw Recipe

Happy Memorial Day!! Hope you are enjoying your three day weekend.

I've been busy cooking, catching up on sleep and swimming laps at my condo's pool. Not a  bad way to spend my time...although laundry awaits.

When I was thinking about recipes to post this week, my inspiration was pretty much shut. Then, I discovered Asian pears were on sale at my grocery store and decided to make a slaw using them.

Alas, my store didn't actually have the Asian pears available. Not wanting to scratch my plans of making the slaw, I decided to use jicama instead!

What is jicama? Well, it looks like a flat giant potato, but it doesn't have to be cooked. Once peeled, it can be shredded or chopped and added to salads. It has a slightly starchy taste, but a crisp light texture.

Combined with carrots, daikon radish and a sweet apple, jicama makes a great slaw. There is no mayonnaise in this recipe, which makes it healthy and perfect for picnics!


 Jicama Slaw with Daikon Radish, Carrots & Apple
serves 4-6

Ingredients
1 jicama, about a size of a large grapefruit, peeled and cut into matchsticks
2 carrots, peeled and cut into matchsticks
1 daikon radish, peeled and cut into matchsticks
1 Fuji apple, cut into matchsticks
2 tablespoons chopped cilantro
juice of 1 lime
1 teaspoon sesame oil
2 tablespoons apple cider vinegar
1 tablespoon ponzu citrus seasoning dressing and sauce
salt & pepper to taste

Directions
1. Combine all ingredients in a large bowl. There is no need to whisk the dressing in a separate bowl.
2. Refrigerate the slaw for at least an hour.


Can this recipe be any easier? I don't think so.

Have you cooked with jicama before? What are you eating this Memorial Day?

5/23/12

What to do with Purple Asparagus: Quick Recipe for a Weeknight Meal


A few weeks ago I attended a media event at the Smucker Farms of Lancaster Co Store in DC. I got a chance to sample some of the wonderful products available at the store including cheese, jams, popcorn, crackers and cookies.

Not only is the space absolutely adorable, but the staff was knowledgeable and friendly. All the products come directly from  Lancaster County, Pennsylvania.

I did not leave empty handed: Smucker Farms graciously gave me a mini crate filled with samples of soap, jam, cheese and other little goodies. {Did I just say goodies?!}

One of the gifts that I was most excited about was purple asparagus. I've never tasted or cooked it before and could not wait.

What did I make with it? Below is a quick write up of my meal, but there are no exact measurements because I was cooking while packing for Seattle and watching TV...you'll just have to improvise.


Quick Recipe for a Weeknight Meal {you can also make this dish for breakfast, brunch or lunch}

Ingredients

olive oil
onion, chopped
purple asparagus, ends trimmed, cut into 3/4" pieces
canned tomatoes without juices
prosciutto, sliced
eggs
salt & pepper
shredded cheese
cilantro, chopped

Directions

1. Heat oil in a skillet.

2. Add onions and asparagus to the skillet and saute until softened.

3. Add tomatoes and prosciutto and cook for a few minutes.

4. Make two indentations in the vegetables mixture and carefully drop in two eggs {clearly without the shells}. Season with salt and pepper and let the eggs cook for a few minutes.

5. Sprinkle everything with cheese, and cook covered until the cheese has melted and the whites of the eggs have set.

6. Garnish with cilantro and serve.

Could this be any easier? You can serve this meal on its own or with some crusty bread.

Alas, the asparagus turns from purple to green while it's being cooked. If you want to retain the beautiful purple color, use the purple asparagus in a raw preparation as my friend Cecilia did.

5/21/12

Recipe for Nutella Ice Cream from Giuliano Hazan's Hazan Family Favorites Cookbook

Before I share a recipe for Nutella Ice Cream from Giuliano Hazan's Hazan Family Favorites Cookbook, I'd like to share a bit of the back story.

I met Giuliano years ago when I assisted his cooking class at Sur La Table. He was soft spoken, yet clearly passionate about Italian cooking. He treated all students and assistants equally and was eager to share his knowledge of ingredients, techniques and recipes.

In fact, I still teach Giuliano's method of chopping an onion in my knife skills classes. Want to learn it? Holler ;)

When I joined Twitter, I started following Giuliano's wife, Lael, and quickly said yes when she offered me a copy of Hazan Family Favorites for review.

A few weeks ago I received a beautiful cookbook with enticing food photographs, touching family photos and recipes that span from pizza to semifreddo.

But where to start?

This past week I visited my family and friends in Seattle. The weather was stunningly sunny and warm, so I decided to make Nutella Ice Cream. Luckily, Anna's friend Naomi let me borrow her ice cream maker, and Anna let me have her bowls and ice cream scoop. The beautiful cutting board is from my brother Misha, who doesn't have a blog or a twitter account, but carved it himself!


Nutella Ice Cream
Reprinted with permission from Hazan Family Favorites
makes 1 quart

Ingredients
2 cups whole milk
4 egg yolks
1/3 cup sugar
4 ounces (1/4 cup) Nutella

Directions
1. Put the milk in a saucepan over medium heat. When the milk is hot enough to release steam when stirred, but not boiling, remove from the heat and pour the hot milk into a heatproof pitcher or cup with a spout.

2. While the milk is heating, put the yolks in a mixing bowl. Add the sugar and whip at high speed until the mixture is pale yellow, thick and creamy.


3. Slowly add the hot milk to the egg mixture while whisking on low speed. Once half the milk is added, you can begin to pour a little faster until all the milk is added. Add the Nutella and whip on medium speed until it is evenly incorporated.

4. Chill the mixture in the refrigerator. When it is cold, freeze in an ice-cream maker according to the manufacturer's instructions. Serve right away or store, tightly covered, in the freezer. It should keep for sever days before ice crystals begin to form.


The ice cream was sweet and screamed NUTELLA. I thought the texture was closer to granita, sonext time I will try using heavy cream or half & half, and maybe adding an extra yolk to the mixture. Anna suggested adding roasted salted hazelnuts for a bit of texture and flavor contrast.


I'm looking forward to making more recipes from Giuliano's book and hope you will too!