Back to Home About Mango & Tomato Contact MePublicity & News Hire Me!Portfolio

9/25/13

Date & Hazelnut Bars: My Take on David Lebovitz's Fruitcake Bars


Earlier this month my friend Cindy gave me a container of dates. After doing a bit of a search for an easy recipe I found David Lebovitz's Fruitcake Bars Recipe. The recipe seemed easy enough, and really the only change I made was the type of nuts I used. David called for walnuts, almonds, or pecans, but I used a combination of hazelnuts, almonds and pecans and added zest of an orange!

Date & Hazelnut Bars: My Take on David Lebovitz's Fruitcake Bars Recipe

Ingredients
1 cup hazelnuts
1/2 cup walnuts
1/2 cup pecans
6 tablespoons flour
1/8 teaspoon baking powder
1/4 teaspoon salt
6 tablespoons packed brown sugar
1 1/2 cups dates, pitted and quartered
1 cup dried apricots, halved
zest of 1 orange
1 large egg
1/2 teaspoons vanilla extract

Directions
1. Toast hazelnuts, let them cool and remove as many of the shells as you can.
2. Toast the rest of the nuts and chop roughly.
3. Preheat the oven to 325F degrees and line an 8x8 baking pan with aluminum foil (use two pieces and make sure they slightly overlap the edges).
4. In a large bowl, mix together the flour, baking powder, baking soda, and salt. Add the sugar, nuts, apricots and orange zest. Using your fingers, mix everything.
5. Add the egg and vanilla extract and mix together.


6. Add the mixture to the lined baking pan and press into an even layer. bake for 35-40 minutes.


Once out of the oven, allow the baked mixture to cool and then cut into the bars (after removing from the baking pan, of course!!!)


These bars were awesome! I really liked the hazelnuts in them!!! These last in a tightly closed container for a few days or can be frozen.


And make sure to share these with your friends!


I'm still in Greece and am still having an awesome time!!! Happy Wednesday to everyone.

9/23/13

What to do with a Tuna Steak: Not Your Average Tuna Salad (aka Big A** Salad)


Sometimes for dinner I make a salad. But it's not your typical salad of lettuce, a few slices of tomatoes and some dressing. That's boring in my opinion. Instead, I make what I call Big A** Salads. I hope you can figure out what that stands for.

My big a** salads typically have several vegetables, a variety of beans and something fun like olives and/or avocado.

This past week I made Not Your Average Tuna Salad (aka Big A** Salad).


Not Your Average Tuna Salad
Ingredients (as much of each as you like)

olive oil
tuna steak
salt & pepper
roasted beets, peeled and sliced
chickpeas
cucumbers, sliced
avocado, sliced
olives
olive oil
lemon juice 


Directions
1. Heat the olive oil in a skillet. Season the tuna steak with salt and pepper and sear for a few minutes on each side so that the tuna is still raw on the inside.
2. Arrange the beets, chickpeas, cucumbers, chickpeas and avocado on a plate.
3. Slice the tuna and add to the plate.
4. Dress the salad with olive oil and lemon juice.

All done!!!

By the way, if you don't follow me on twitter, I'm in Greece!! Make sure to follow my instagram feed to see all the photos ;)

Chat laters!!!

9/20/13

Sweet Potatoes with Black Beans, Avocado & Feta: Recipe Inspired by The Kitchn


When I saw a recipe for Kale and Black Bean Tacos on The Kitchn, I thought it'd be a great one to make during the weekend and to have as leftovers for the week. But then I changed my mind...well, not entirely. I decided to keep the black beans, the sauce and the pumpkin seeds, but use spinach instead of kale and make it into a side dish instead of tacos. I also added feta!

That's just how my brain works ;)

Sweet Potatoes with Black Beans, Avocado & Feta: Recipe Inspired by The Kitchn
Adapted from The Kitchn

Ingredients (4 servings)
2 teaspoons olive oil
2 medium sweet potatoes, peeled, diced
15 ounce can black beans, rinsed and drained
4 cups baby spinach
salt & pepper
2 avocados, chopped
1/3 cup feta, crumbled
pumpkin seeds

for the sauce
3 garlic cloves, smashed
1 shallot, quartered
1 cup parsley leaves
1/4 cup olive oil
1 tablespoon lemon juice
salt & pepper
pinch of red pepper flakes 


Directions
1. Heat the olive oil in a skillet. Add cubed potatoes and saute until tender.
2. Add black beans and spinach and saute for a few minutes until the spinach has wilted. Season with salt and pepper.
3. In the meantime, puree all the ingredients for the sauce.


To serve, add sweet potato/black bean/spinach mixture to a bowl. Top with the green sauce and add avocado, feta and pumpkin seeds.


You can serve this hot, at room temperature or cold. The sweet potato/black bean/spinach mixture can be served for breakfast with an egg on top. The green sauce is great as a dressing for potato salad or served on top of poached salmon.


Thanks The Kitchn for the inspiration!!

I'm off to GREECE on Saturday for a week, but don't worry, I'll have a few new posts coming up in the meantime ;)

Have a great weekend!

9/17/13

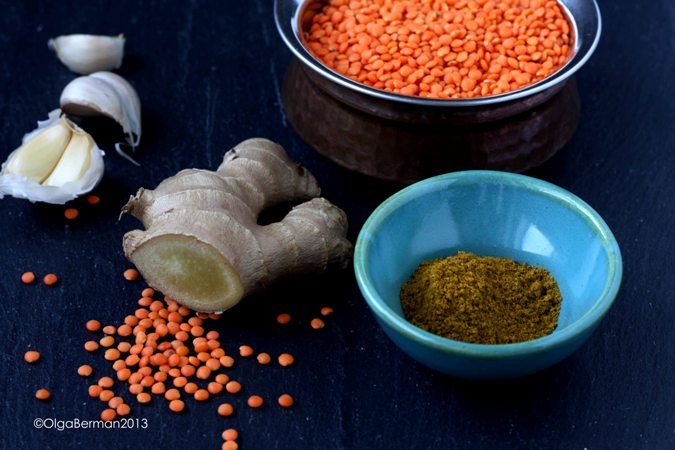
Curried Lentils with a Poached Egg


I love lentils. I love poached eggs. I love Indian food. So when Elyssa tweeted about a dish of curried lentils, poached egg, yogurt sauce, parsley and crusty bread she had at Breslin in New York, I knew I would try to replicate it.

That's how I came up with Curried Lentils with a Poached Egg.


Curried Lentils with a Poached Egg
Serves 2


Ingredients
1 teaspoon olive oil
1 tablespoon finely chopped ginger
2 garlic cloves, chopped
2 teaspoons curry powder
1 cup orange lentils
2 cups water
salt
2 poached eggs
chopped cilantro
yogurt
tortilla chips (or bread...depending on what you have)
cucumber slices


Directions
1. Heat the oil in a pot. Add ginger and garlic and saute until fragrant.
2. Add the curry and saute for 2 more minutes.
3. Add the lentils and water. Season with salt. Bring to a boil, lower the heat and cook covered for 10 minutes or until the lentils are cooked through.
4. Divide the lentils into two bowls, top with a poached egg and cilantro and serve with yogurt, tortilla chips and sliced cucumber.


This was definitely a success! Next time I might add cumin seeds and mustard seeds to give a bit of texture to the lentils. I just wish the lentils retained their pretty orange color...maybe turmeric?


Try this for breakfast soon!!

9/15/13

Cheesy Mexican Corn Recipe: Great Side for Lunch or Dinner


I love Mexican corn, but it tends to be a bit messy. Not that there's anything wrong with messy. Sometimes, though, I want something simple and easy. Instead of making Mexican corn on the cob, I cut off the kernels to make this Cheesy Mexican Corn side. You can serve it as a side, a dish on its own or even as a dip.

Make it while the corn is still sweet.

Cheesy Mexican Corn Recipe: Great Side for Lunch or Dinner

Ingredients for 1

drizzle of olive oil
kernels from 1 corn
1/4 red onion, diced
1/2 jalapeno, sliced (keep the seeds for extra heat)
salt to taste
1-2 teaspoons bourbon paprika
2-4 tablespoons shredded Mexican cheese
1/2 lime, juiced
2 tablespoons chopped cilantro


Directions
1. Heat olive oil in a skillet.
2. Add the corn, onion and jalapeno and season with bourbon paprika and salt.
3. Saute the vegetables until they are tender, 5-10 minutes. Add the cheese and allow to melt.
4. Take the pan off the heat, add lime juice and cilantro.
5. Serve immediately.


Have you tried Mexican corn yet?

9/12/13

Sriracha Edamame Appetizer: Your Lips Will Be on Fire!


Get ready to spice up your life, or at least bring some heat to your lips, with this Sriracha Edamame Appetizer. This recipe is inspired by my twin Anna's creation. When I was visiting my family in Seattle in June, Anna had a get together with her friends to watch The Bachelorette and made a fun appetizer of edamame cooked in a skillet with soy sauce, sriracha, and a few other things.

This is my version.

Sriracha Edamame Appetizer: Your Lips Will Be on Fire!

Ingredients

10 ounces frozen edamame
2 teaspoons oil
a few splashes of soy sauce
a few squirts of sriracha 
2 garlic cloves, sliced
splash of sesame oil


Directions
1. Cook edamame in boiling water for 2 minutes. Drain.
2. Heat the oil in a skillet, add edamame, soy sauce and sriracha. Saute for 5 minutes.
3. Add sliced garlic and saute for 2 more minutes.
4. Taste and add more soy and/or sriracha as needed.
5. Drizzle with a bit of sesame oil before serving.


Ooh, this was spicy!!! Of course you can add as much or as little sriracha depending on your tolerance for heat. This is best served hot.

You'll have no leftovers.


Have you cooked frozen edamame? How do you like to eat it?

Have a fabulous weekend!

9/9/13

DIY Baby Shower Gift: a photograph for each month for the first year

I thought I'd take a tiny little break from food blogging and share with you a project I made for my friends' baby shower. I wanted to give my friends something personal and handmade on top of a few cute onesies and a blanket.

Here's what I did:

1) purchase a fun picture frame

2) make inserts with "welcome to the world," "1 month"........... "11 months," and "1 Year!" written on them

3) decorate each insert

Once the baby is born, I hope my friends will take a picture of her with the frame close by to document the first year of her life.


At the end of the 1st year, they can place one of the photos in the frame.


I'm soooo pleased with how this came out, and my friends loved it too!


I'll get back to food in the next post :)

9/8/13

Black Bean and Chicken Soup Recipe


Back in March I bought myself my first oval Le Creuset. It's orange and beautiful, but it stood around my condo for months before I finally decided to use it. What was I waiting for???

The first dish I made in my oval Le Creuset was this Black Bean and Chicken Soup. The recipe has been sitting in my drafts folder for a while, and it's time I finally type it up. Make it! You will like it for sure.

Black Bean and Chicken Soup
4-6 portions


Ingredients
drizzle of olive oil
1 white onion, diced
3 garlic cloves, chopped
1 jalapeno, seeded, chopped
2 boneless skinless chicken breasts, diced
1 teaspoons cumin
1 teaspoon coriander
1 teaspoon smoked paprika
salt & pepper
28 ounce can diced tomatoes with its juices
2 cups black beans {I used home made ones}
2 cups frozen corn
8 cups liquid {I used 4 cups of the liquid in which I cooked the beans: it was really flavorful, but made the soup look black.}

toppings
sliced avocado
chopped cilantro
sour cream


Directions

1. Heat the oil in a large soup pot. Add the onion, garlic, jalapeno and chicken and saute for 5 minutes.
2. Add in the spices and salt & pepper and saute for 3 more minutes.
3. Add the rest of the ingredients (except for the toppings), bring to a boil, lower the heat, cover, and simmer for 30 minutes.


4. Serve the soup with sliced avocado, chopped cilantro and some sour cream.


This was flavorful, healthy and filling. If you want, you can add tortilla chips on top.

If you have an oval Le Creuset, what have you been cooking in it?

9/5/13

Eating out with Instagram: Dinner at Doi Moi in DC with Evi


For our monthly dinner date, my friend Evi and I decided to check out the recently opened Doi Moi. Ok, technically I decided, and Evi agreed: she always lets me choose, and, luckily, I haven't disappointed yet. Doi Moi did not disappoint either. 

Doi Moi comes from Mark Kuller and Haidar Karoum who have two successful restaurants in DC: Estadio and Proof. Having been to both and loving not only the food but also the decor, I was eager to try out their third creation. The decor in Doi Moi is a combination of clean modern white elements with eclectic, colorful and Asian influences. I now wish I took a few photos: you'll just have to go and look for yourself, or check out a some photos from Eater DC.  Don't miss checking out the ladies' bathroom with its bright red tiles and black and white photography. I can't tell you what the men's bathroom is like.

Let's talk about the food. We started with beer (I had a papaya Kona variety) and then chose four dishes to share. While the noodles with vegetables seemed to be missing something, the other three dishes were great! I really enjoyed the fried squid with fried onions, the halibut curry and the duck curry. Make sure to order rice on the side. 


Aren't the colors of the dishes pretty? It's almost as if you can taste the heat and the acidity just by looking at them. The halibut was flaky and came in the spiciest sauce of the night. The duck, which I don't typically order, was tender and cooked to medium rare with a deep slightly sweet curry. 

Forget the option of brown rice and stick with sticky one (I could not help myself!!!).

The four dishes were a great amount of food for two people, but we decided to go for one more course. Evi ordered fried spring rolls, and I decided on a swirl: soft served combination of mango and sticky rice ice cream. It was the best way to cool my lips and tongue from the spicy dinner and serve as a sweet finale.


The service was spot on: we received recommendations, were asked how we liked our dishes and our water glasses were never empty.

I really liked all the plates, bowls, dishes and forks used in the restaurant: I would sooooo want one of each for my prop collection. Just saying.

This was not an inexpensive meal, but it was definitely money well spent. With two beers and 6 dishes total, plus tax and tip we each paid $54.

I need to go back to try out some of the other dishes.


Have a great weekend and go try something new in your city!

9/4/13

Peachy Mango Salsa Recipe Inspired by Diamond Candles


What does Peachy Mango Salsa have to do with candles?? Well, there is a back story to this recipe.

Last month I received an email asking if I'd like to try out one of the Diamond Candles and write about them. I'll be honest: my first thought was what do candles have to do with a food blog? But then I decided to check out Diamond Candles website and found beautiful soy candles with fun names and beautiful colors.

And the kicker was that each candle had a ring hidden in it!!! WHAT!?!? Yes!

So I decided to request a Peachy Mango candle and make a recipe with similar flavors: Peachy Mango Salsa.

And if you are wondering what kind of a ring I found in my candle, well, you'll have to just read till the end of the post to find out.


Peachy Mango Salsa
Ingredients
1 peach, halved, pit removed, and chopped
1 mango, peeled, pit removed, and chopped
1/2 jalapeno, seeded, finely diced
1/2 lime, juiced
2 tablespoons finely chopped red onion
2 tablespoons chopped fresh basil
salt to taste
 

Directions
1. Combine all the ingredients in a bowl and refrigerate for at least 30 minutes.


Aren't the colors gorgeous? Hurry up and make this salsa while peaches are still sweet and juicy. You can serve it with chips or as a topping for grilled fish or chicken.


And now let's get back to the candle: it has a lovely sweet but not overpowering fragrance and burns incredibly cleanly. I've been lighting it almost nightly in the anticipation of finding what kind of a ring was hidden inside. The value of the ring could be anywhere from $10 to $5,000!!! Although my ring most likely costs under $20, I think it's super pretty and fun. I'm going to try really hard not to wear it on my engagement ring finger as not to scare away any potential boyfriends ;)


For more information on Diamond Candles check out their Facebook and Twitter.

Disclosure: Diamond Candles sent me a Peachy Mango candle to try but did not pay me for this post. All opinions are my own. I would definitely treat myself to another one of their candles for a fun occasion.

9/2/13

Honey Apple Cake Perfect for Rosh Hashanah: Russian Recipe Revisited


This Wednesday is Rosh Hashanah: Jewish New Year. Although growing up in Russia I knew I was Jewish, religion wasn't a part of my life. When my family moved to the States when I was 13 years old, we went to a synagogue a few times, but it was hard for me to all of a sudden start believing in God.

Instead, I consider myself a cultural Jew: I ♥ Jewish traditions, most of the holidays {I stopped fasting for Yom Kippur several years ago}, music and Hebrew language.

It's traditional for Rosh Hashanah to eat apples dipped in honey to symbolize a sweet year to come. I can use all the sweetness I can get! And so despite not actually really liking honey, I follow this tradition.

This weekend I decided to make one dish that would perfectly fit two categories: Russian Recipes Revisited and Jewish Holidays. This is how Honey Apple Cake came about!


Ever since I remember, my mom has been making apple cake. She actually has the recipe memorized: the woman has amazing memory. In fact, my mom knows most of the phone numbers by heart, and even before she learned how to drive she knew the routes better than my dad. Alas, I did not inherit my mom's sense of direction.

But let's get back to this apple cake. The cake is incredibly easy to make and basically has apples covered with a simple batter. I changed my mom's recipe by sauteing the apples in a bit of oil and honey to make it perfect for Rosh Hashanah.

Honey Apple Cake
Ingredients
3 eggs
1 cup sugar
1 cup flour
1/2 teaspoon baking soda
1 teaspoon white vinegar
1 tablespoon sour cream
baking spray
2 teaspoons oil
3 large Granny Smith apples, quartered, cored, chopped 
3 tablespoons honey

Directions
1. Preheat the oven to 375.
2. In a large whisk 3 eggs.
3. Add 1 cup of sugar to the egg mixture and blend together.
4. Pour 1/2 teaspoon of baking soda into white vinegar - the two ingredients will react and bubble - add to the bowl with eggs and sugar and mix.
5. Slowly incorporate the flour into the above mixture.
6. Add 1 tablespoon of sour cream to the batter and set aside.
7. Spray a Bunt cake pan with baking spray.
8. Saute the apples in oil and honey for about 5 minutes. Allow to cool and then transfer to the Bunt cake pan.
9. Cover the apples with the batter.
11. Bake in the oven for 45 minutes to an hour, until the top is golden brown and the toothpick comes out clean and dry.
12. Let the cake cool, and flip on a serving plate. Enjoy! 


So the cake did not turn out perfect. Such is life. The batter did not go all the way to the bottom (which became the top) of the cake...so it doesn't look perfectly pretty.

My mom thinks that because I sauteed the apples, they became heavier than normal and did not float toward the top as the cake baked, thus not allowing the batter to sink down.


If you are going to make this recipe, you might want to pour just enough batter into the pan to cover the bottom of the pan before adding the apples and the rest of the batter.


This cake is great as dessert, but is also a perfect breakfast treat with a cup of coffee.


In the past, I've made this recipe using blueberries and peaches, which was awesome for the late summer days.

If you want a few alternative recipes for Rosh Hashana, try Honey Almond Cake with Orange Zest or Honey Nut Date Cake.
I hope you all have a very sweet Rosh Hashanah!