Back to Home About Mango & Tomato Contact MePublicity & News Hire Me!Portfolio

7/30/14

Fizzy Cantaloupe, Mint & Champagne Dessert


What inspires you in the kitchen?

This Fizzy Cantaloupe, Mint & Champagne Dessert was inspired by a pretty teacup I found at an estate sale last weekend. How adorable is this teacup???

All you need for this light bubbly dessert are cantaloupe balls (or cubes), a bit of vanilla sugar, chopped fresh mint and your favorite champagne or sparkling wine.


First, combine cantaloupe balls with a bit of sugar and let them sit for about 30 minutes in the refrigerator.

Second, add fresh mint to the sweetened cantaloupe balls and put into pretty teacups or glasses.

Third, pour champagne directly over the cantaloupe balls and mint.

You are done!


This is a refreshing and light dessert to have in the hot summer months. Or this could be a lovely boozy snack ;)


What inspires YOU in the kitchen?

7/28/14

Grilled Eggplant with Buttermilk Sauce, Cherries & Pine Nuts Inspired by Ottolenghi


UPDATE: my computer was repaired enough for me to edit photos, so I've updated this post with real photos. Alas, the laptop is back at Best Buy being repaired ;(

How was your weekend? Mine was pretty awesome: great time hanging out with my friend Cecilia on Saturday. We had brunch, went to an estate sale, walked around and had sushi. Love spending time with friends!

Then Sunday I had plans to cook a few things, edit a zillion photos and take a nap. Most of these things happened other than editing a zillion photos because my laptop started shutting down every 2 minutes. It's currently being looked at and who knows what the Geek Squad will find....I'm slightly nervous.

Needless to say, I don't have any edited photos to post, so I'm posting one from instagram. The photo above is of an eggplant recipe I made inspired by the one from Ottolenghi. The only part of the recipe I followed is the buttermilk sauce, and even that I changed ;) That's how I roll!

Thanks to Sonia for the suggestion to make the original recipe!

Grilled Eggplant with Buttermilk Sauce, Cherries & Pine Nuts

Ingredients
1 eggplant, sliced into 1/4" rounds
salt & pepper
olive oil
1/2 cup Greek yogurt
1/2 cup buttermilk
1 garlic clove, microplane'd
pinch of red pepper flakes
1 cup cherries, pitted, chopped
1/4 cup toasted pine nuts
2 tablespoons chopped cilantro

Directions
1. Preheat your Panini maker and brush it with olive oil. Season each side of eggplant rounds with salt and pepper and grill in the Panini maker for 10 minutes. {If you don't have a Panini maker, you can roast your eggplant at ~ 400F oven for 5-8 minutes on each side or until it's cooked through or sauté the rounds in a bit of olive oil in a skillet on top of the stove.}
2. To make the buttermilk sauce, whisk together Greek yogurt, buttermilk, red pepper flakes and season with salt.
3. Serve the grilled eggplant on a platter topped with the sauce, cherries, pine nuts and cilantro.


You guys!!!!! This was DIVINE! I haven't tried the original recipe from Ottolenghi, but I seriously think my recipe may be better, and it's for sure way easier to make. Plus, cherries are now in season, so why not use them instead of the pomegranate?

I hope you had a lovely weekend!

7/24/14

What to do with Jalapenos? Roasted Jalapeno & Melon Salsa, Gazpacho or Popsicles


When I went to buy one jalapeno for the Farro Salad with Corn & Nectarines, I had to buy 6 because that's how Trader Joe's sold them. So 6-1=5. I had 5 jalapenos to deal with...what to do???

I decided to fire roast them and then create a fun recipe with them using what I had on hand: mainly a melon. First I created a Roasted Jalapeno & Melon Salsa and then I turned that creation into two other dishes.

To roast jalapenos:
Put them directly onto the gas flame and rotate until the peppers are completely black. Put the blackened jalapenos into a covered bowl for about 5 minutes, then carefully remove the skin, the stem and the seeds.

WARNING: you may want to use gloves when handling the jalapenos. My fingers were burning for hours.


Roasted Jalapeno & Melon Salsa
Ingredients

1-2 roasted jalapenos, skin, seeds removed, finely chopped
1 melon, peeled, chopped (~6 cups)
2 diced peaches
juice of 1 lime
2 teaspoons salt
2 tablespoons chopped cilantro

Directions
1. Combine all ingredients in a bowl.
2. Eat with chips.


CONFESSION: I originally made this salsa using THREE jalapenos and only 1/2 of the melon. When I tried the salsa, I thought I would die from the heat. It was too much for me. So I added more melon. It was still pretty spicy, but not to the level of I'm going to die. So please follow the recipe above and maybe start with one jalapeno, taste, and then add the second one if you want more heat.

The recipe above is great not only as salsa, but also as gazpacho or popsicles!

For gazpacho, puree the salsa recipe and serve in glasses. You can also add fresh tomatoes to the blender and simply adjust salt and lime amounts.


For adult popsicles, puree the salsa recipe and add to the popsicles molds. Make sure your kids don't eat them!


You can also freeze the roasted jalapenos after removing the skin, stem and seeds for use in the future recipes.

7/21/14

Farro Salad with Nectarines and Corn Adapted from Vibrant Food Cookbook


Last month I received a preview copy of a cookbook called Vibrant Food written by Kimberley Hasselbrink, the creator of The Year In Food blog.

Kimberley's recipes are divided into categories based on four seasons and highlight the best ingredients each season has to offer. The photos are vibrant, not fussy, and make you want to get into your kitchen and start cooking!

Oh, and you know what else is cool about this book? There is a photo for each recipe!!! No need to guess what the final dish will look like: it's all there for you.

The first recipe I wanted to try was Green Rice Salad with Nectarines and Corn. Once I came back from the grocery store, turned on salsa music and went into my kitchen to start cooking, I realized that I actually did not have the brown basmati rice in my pantry as I thought I had.

Note: by pantry, I mean one of my little kitchen cabinets. God, I wish I had a real pantry!

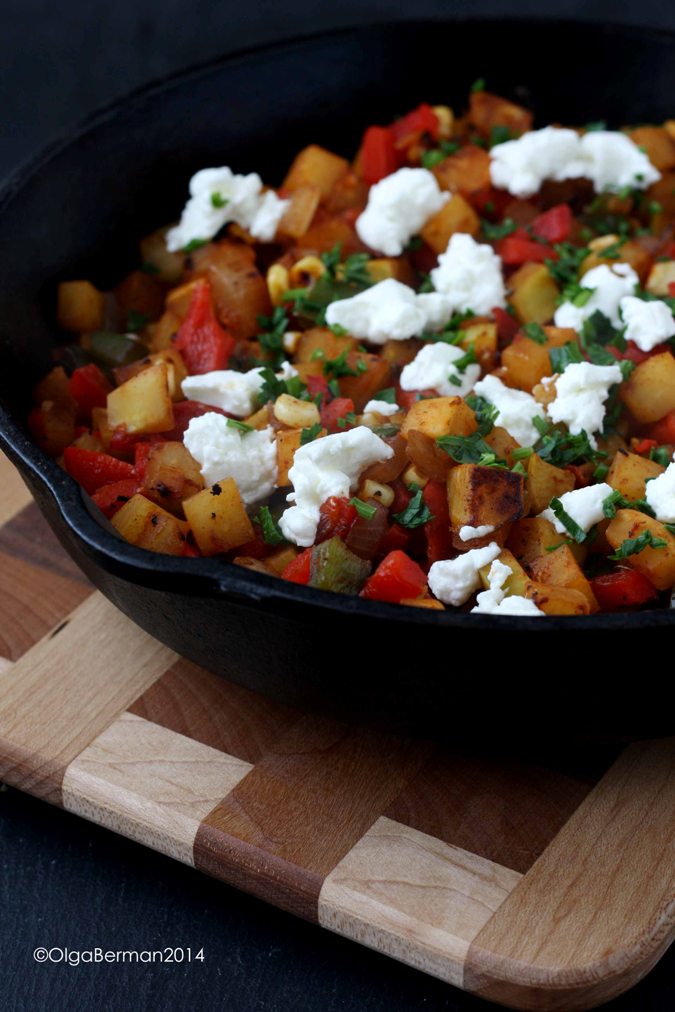
After a mild panic attack, I decided to make the recipe using farro! I also made a few other changes to Kimberley's recipe. The main changes were these: I sauteed corn kernels instead of grilling the whole corn and I used goat cheese instead of queso fresco because I've noticed that queso fresco always spoils way too quickly in my fridge.

Farro Salad with Nectarines and Corn Adapted from Vibrant Food Cookbook
Ingredients
3/4 cups farro
1 1/4 cup water + 1 tablespoon for the sauce
1/2 cup coarsely chopped cilantro, extra for garnish
1/4 cup loosely packed fresh flat-leaf parsley leaves, extra for garnish
1 small jalapeno, seeded and chopped
zest and juice of 1 lime
1 tablespoon extra-virgin olive oil
fine sea salt
olive oil for sautéing the corn
2 small ears of corn, kernels cut off
2 medium-ripe nectarines, pitted and sliced
1/2 cup crumbled goat cheese 


Directions
1. Cook farro in salted water: bring everything to a boil, lower the heat to simmer, and cook farro covered for about 20-30 minutes.
2. In a blender combine cilantro, parsley, jalapeno, lime zest and juice, olive oil, a pinch of salt and 1 tablespoon water. Blend until smooth.
3. Add the sauce to the cooked farro while it's still warm so that the flavors would combine better.
4. Meanwhile, saute the corn kernels in a bit of olive oil. Add to the farro.
5. Serve the salad topped with nectarines, goat cheese and remaining herbs.


This was a fantastic salad! I liked the chewy texture of farro mixed with the creamy goat cheese. My favorite parts of the salad were the sautéed corn, sweet nectarines and the goat cheese ;)

What are your favorite summer salads?

Disclosure: I was provided with a free copy of the Vibrant Food cookbook by the publisher but was not paid for this post. All opinions are my own.

7/18/14

Recycling in the Kitchen: Cheater Refrigerator Green Beans


Do you recycle in your kitchen? I try my best to recycle plastic bottles, boxes from pasta, occasional can of Diet Pepsi and metal cans from tomatoes.

What about recycling ingredients though? One of the simplest ingredients to recycle is the liquid from your favorite jar of pickles. Use that liquid to make quick Refrigerator Green Beans!!

Recycling in the Kitchen: Cheater Refrigerator Green Beans

All you need is the following
1) jar of your favorite pickles: eat the pickles, save the liquid
2) green beans, ends trimmed
3) large pot of boiling water

Here's what you do:
1) add the beans to the pot of boiling water for just a few minutes
2) drain the beans and add directly to the liquid remaining in the pickle jar
3) let the beans cool down on your kitchen counter and then refrigerate for a few days before eating


How easy is that????

You can do the same with broccoli, summer squash, peppers and even watermelon!! Do NOT boil the watermelon though ;)


How do YOU recycle in your kitchen?

Any fun cooking weekend plans?

7/16/14

How to Grill Green Beans Without a Grill? Panini Maker!!


Last week my friend Sylvie tweeted that her mother in law was bringing her a bunch of fresh green beans. I asked what she was planning to do with them, and Sylvie tweeted back that she was just going to grill them.

Well, unlike Sylvie, I don't have either a mother in law or a grill. I did, however, had quite a large amount of green beans from my latest Washington Green Grocer order.

In the past, I've pan sautéed the green beans, pickled them, and roasted them. This time, inspired by Sylvie's grilling idea, I decided to do just that. Grill them. But how did I do that without a grill?

How to Grill Green Beans Without a Grill? Panini Maker!!

I think this was quite a brilliant idea on my part. There's no need to heat the oven. Just heat your Panini maker, season the beans with olive oil, salt and spices, and then put them perpendicular (those math classes really come in handy!!) to the Panini maker's grilling thingies in a single layer. 10 minutes later you have grilled beans!!!

There's no need to turn/flip the beans as you'd have to do if you were to roast them or use a grill pan because the Panini makers grills them from top and bottom. Your house doesn't get overheated. You end up with tender beans with adorable grill marks!

This is going to be my favorite method from now on!

What spice did I use? Green zatar. But you can use whatever you want!


Eat these beans as is, add them to salads or serve on top of farro. They are also great topped with goat cheese.


What's your favorite method for cooking green beans?

7/14/14

Potato Free Hash!? Yes! Kohlrabi Hash with Corn and Chevre


What comes to mind when you hear the word hash? For me, it's an image of brunch, perfectly cooked crispy cubes of potatoes mixed with onions and maybe pulled pork topped with an egg.

But what if you did not have neither the potatoes nor the eggs? Guess what? You can still make a flavorful breakfast or brunch hash. In this particular variation of hash I used kohlrabi!!

Kohlrabi can be eaten raw or cooked, which means it takes less time to cook than potatoes. I added a few other ingredients to the dish for color, texture and flavor and created something that is great eaten directly from a skillet piping hot or the next day straight out of the refrigerator.

Potato Free Hash!? Yes! Kohlrabi Hash with Corn and Chevre
Serves 2-4

Ingredients

2 teaspoons olive oil
2 medium kohlrabi bulbs, peeled, diced ~ 1/4"
1/2 white onion, diced
1/2 green pepper, diced
kernels from 1 ear of corn
salt to taste
2 teaspoons smoked paprika
1 roasted red pepper, diced {I used red roasted pepper from a jar, but you can roast your own}
1 tablespoon chopped parsley
1/4-1/3 cups chevre {aka goat cheese!}


Directions
1. Heat a cast iron skillet. Add oil and allow the oil to get hot. Add kohlrabi, onions, green pepper and corn. Season with salt and smoked paprika and sauté for 15-20 minutes. You want the kohlrabi to be cooked through and slightly caramelized.
2. Add roasted red pepper and allow to heat through.
3. Serve topped with parsley and chevre.


I loved how the cheese immediately started to melt once it hit the hot vegetables. If I had eggs in my fridge, I would have definitely poached or fried them to add to this dish, but it's not a requirement.


Want a few other ideas for hash? Check out my previous posts!


7/9/14

Greek Culinary Vacation: Kea Artisanal

Today I bring you a photo essay about my experience at the Kea Artisanal Cooking School on the Island of Kea in Greece last year. {Don't forget Monday's post about Tomato Bread!}
 
This, of course, is also my I haven't cooked or photographed anything for the blog so you get photos from my vacation instead of a blank screen ;)
 
Enjoy!
"KEA ARTISANAL introduces visitors to the Mediterranean way of eating, entertaining, and living. Award-winning and internationally renowned cookbook author Aglaia Kremezi with her husband and a select group of friends lead you on a fascinating journey through authentic Greek island food.
The program includes hands-on cooking classes, wine, cheese, olive oil and honey tastings, as well as explorations of the beaches, villages, and unique archaeological sites of the island."
 
Above is the official description. Below is my photo evidence! Please note that my time at the Kea Artisanal was not a media trip: I paid my own way and found it completely worth the $$$. I am not getting any compensation whatsoever to share this information with you. I just want to inspire you to think about your next vacation and to dream a little and to try something new! Why not a culinary trip to Greece?
 
Costas educating the group about Greek cuisine

Aglaia demonstrating a recipe for bread before we all had a chance to make our own

Cheese tasting


Honey tasting

Yogurt tasting: seriously the best yogurt I've ever had. I also got to bring this terracotta pots home!!!

Make sure to come back Friday for one more post!!!

Have you ever taking a culinary vacation? Or taken a cooking class while visiting a new place? What did you think?

7/7/14

Aglaia Kremezi's "Tomato Salad" Bread: Memories of Greek Vacation

Happy Monday! This is my first full week being back at work after coming back from Italy. I haven't really been cooking much, so today I'll share a recipe with you that I learned how to make when I went on a culinary vacation with my friend Cecilia to GREECE!

Last September, Cecilia and I flew to Athens, then took a cab, then a ferry, then another cab to attend a culinary program on the island of Kea: Kea Artisanal. It was a great way to splurge, learn about Greek cuisine, drink a lot of wine, and be in the company of wonderful people.

Aglaia Kremezi and her husband Costas were warm, welcoming, and wonderful hosts. I felt like I was visiting long lost aunt and uncle. Each morning we would arrive to their house, drink coffee, learn a few recipes, have a fabulous lunch outside followed by wine tasting (or honey or olive oil or yogurt), then go back to our own hotel for a nap and then meet again for evening activities. The experience was something I'll never forget.

One of the things we learned how to make was "Tomato Salad" Bread. Carbs and tomatoes? What's not to like. I'm sad to say I haven't made the Recipe since coming back, but that's easy enough to change. I bet looking at the photos below you'd want to make that recipe too!!


What have you been cooking lately?

7/1/14

Chicken Dip with Mango, Red Curry Powder & Stonefire Naan Crisps


A while back I received a box of Stonefire's new crisps to try. As someone who loves snacking, carbs, and crispy things, I was happy to create a recipe inspired by one of the flavors: Tandoori Spice Naan Crisps.

"We spent years perfecting the authentic recipe for our Stonefire® Naan Flatbread. That same quest for authenticity drove the creation of our Stonefire® Naan Crisps. Flame-baked, using no artificial preservatives, Stonefire® Naan Crisps are a versatile snack paired with your favorite toppings or enjoyed plain right out of the bag. We present them to you with the same promise of great taste and authenticity as all of our Stonefire® products."


Chicken Dip with Mango, Red Curry Powder & Stonefire Naan Crisps
Ingredients
1 large skinless boneless chicken breast, poached, shredded and then chopped
1-2 tablespoons finely chopped red onion
1/2 mango, peeled, diced
1 tablespoon chopped cilantro
1/2 Asian pear, diced
red curry powder to taste {start with a few teaspoons, and add more for a spicier flavor}
mayo to combine
salt to taste
to serve: Stonefire Tandoori Spice Naan Crisps


Directions
1. Combine all ingredients but naan crisps. Refrigerate for at least 30 minutes before serving.


Disclosure: I was provided with sample products but was under no obligations to create a recipe. I was not compensated for this post. All opinions are my own.